Your Cart is Empty
This is a visual summary of my first ever use of the David SLS-1 3D structured light 3D scanning Kit, from the unboxing to 3D Print.
On first impressions, the kit is well presented, all components are of a high quality and well finished. The box has sponge inserts and can be reused for safe portability and storage. From the anodized bracket, the aluminium calibration boards to the tripod - all things have been well considered. There's even a decent HDMI cable and a universal power adapter.

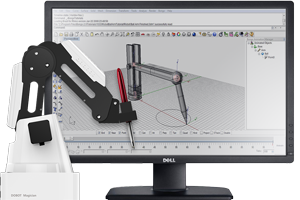
The David SLS-1. This Complete Kit with everything you need to start 3D scanning.

The included Acer K11+ Structured Light Projector has a customised lens with a high focal range, enabling it to be calibrated for large and small scanning volumes. You can use it as a movie projector as well with surprising picture quality and contrast.

The new DAVID-CAM-3-M now with double the resolution (1280x960). Can it capture the claimed 40 mircon detail? Let's find out....

The high quality 12mm Computar Lens is now included in the David SLS-1 3D Scanning kit for increased precision and accuracy.

Test One: The Finger Print Test - I just had to give it a go. The image shows the fringe patterns being projected onto the subject.

Wow...My heart skipped a beat! I have seen scanners 30 x the price that would not stand a chance at getting this kind of detail. The David Lasserscanner 3.6 software is intuitive and easy to navigate. It takes you through the required workflow step by step. Hardware Setup, Calibration, Scanning, Alignment and finally Fusion where the model is stitched together into one complete object. The included colour manual takes you through each step of the way.

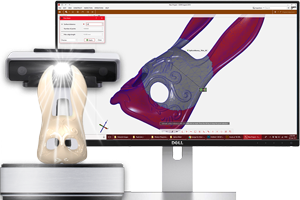
Test Two: The Lion. A small lion that is 100mm in length which has some very fine texture, will the David SLS-1 pick it up?

The hardware is quick and easy to set up, the only tricky thing is working out what the squiggly lines on the screen are. They are used to get the exposure right. No need to install any software as it runs off the USB dongle. All I needed to do was install the camera drivers and turn the project on. I have used other scanners before, the logic remains the same. The first stage of the set up is decide what size volume you want to capture with each shot. A good rule of thumb is to set it up the scanners so you can fit your entire object in a single shot. That way it is going to be easy to work around the object to capture is in it's entirety. If you need more detail, you can always go down to a smaller volume but you will need to take more shots to get a complete model. Here the scanner is set up and calibrated, ready for our lion test scan.

I thought tigers had stripes, now lions do too! These are the projected fringe patterns from the SL projector K11+projector. Make sure the exposure of the camera matches the colour of your object.

The first captured image from the structured light scanner using the David 3.6 software. The David sls-1 scanner has no problem picking up the fine texture.
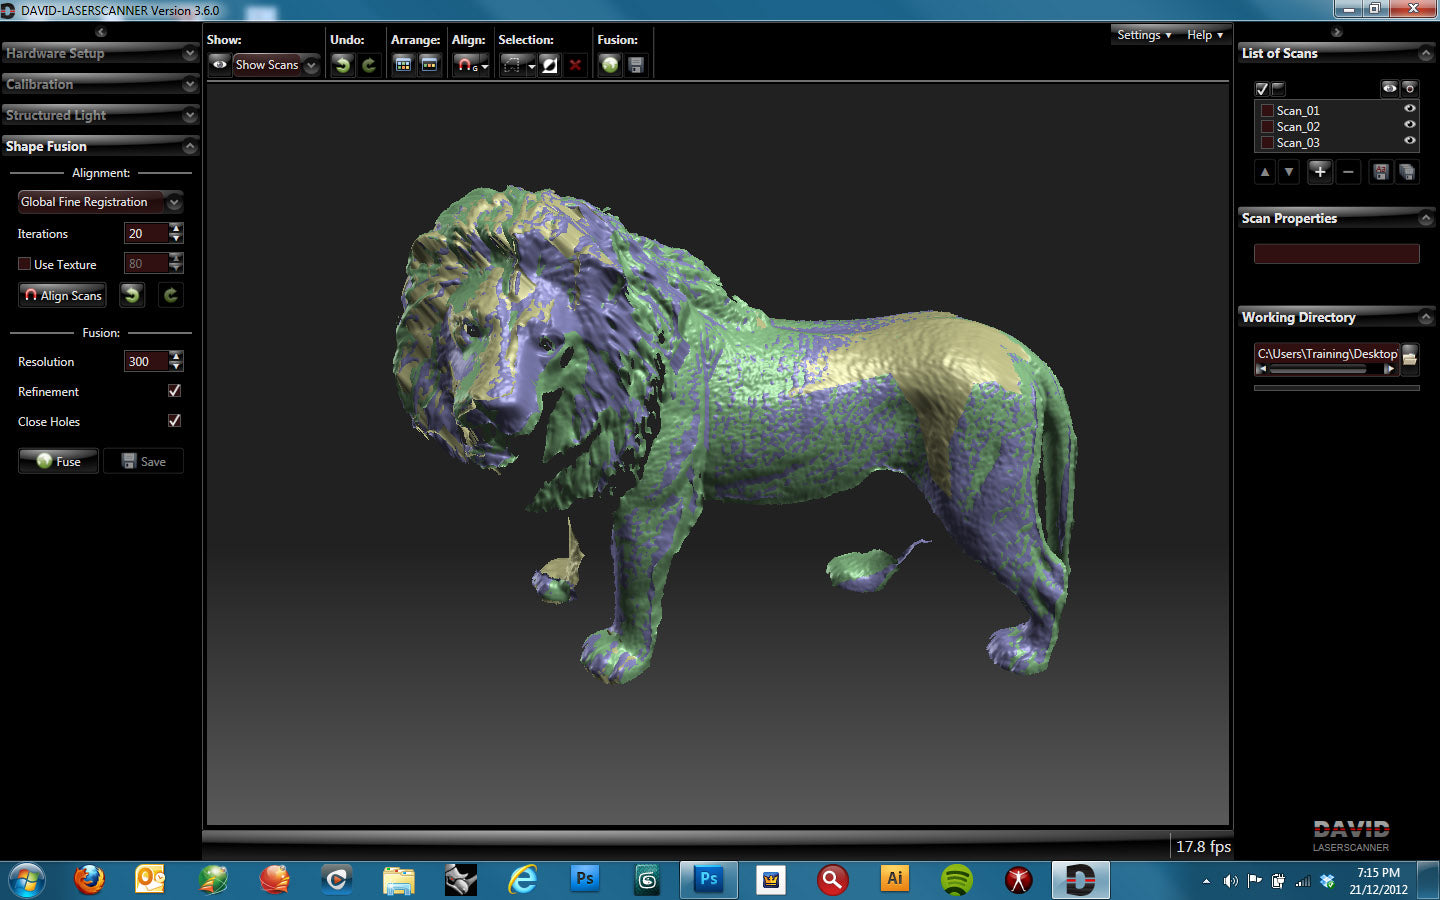
The David Laserscanner software finds common features between each capture which it uses to align them together.

The face on this model is smaller than a finger nail, the resolution on the scan is truly astounding.

The multiple scans are stitched together into a watertight using the Shape Fusion command. The final result on the lion blew me away! The texture on the model is finer than you can see with the naked eye!

The complete model stitched together into a watertight model, ready for reverse engineering or 3D Printing.

Half way through the print. Check out the tail held on the platform by the support structure which is automatically created with the Up! 3D Printer software.

Hot off the press! The lion was 3D Printed at 1:1 scale in "Tickle me pink" filament on the Up! 3D Printer Plus.
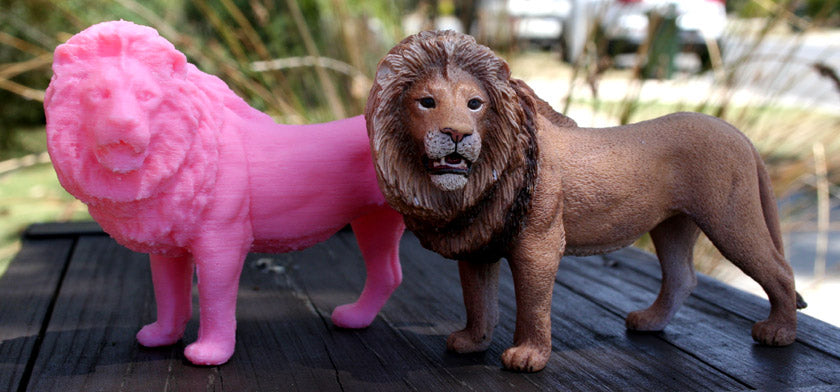
The 3D Printed Lion standing next to the original scanned object.

3D Scan to 3D Print reproduction using the David SLS-1 Structured Light Scanner and the Up! 3D Printer Plus
Conclusion:
The David SLS-1 Structured Light 3D Scanning Kit by David Vision Systems (Germany) is truly a remarkable package. They have carefully composed the best cost to performance 3D scanning system on the market to date, without compromising on quality. The package is very complete and includes everything you need to start scanning. It has an upgraded camera and lens enabling double the resolution down to 40 microns (0.04mm) and is backed with a 2 year warranty. The system is versatile by being able to be calibrated to scan different volumes. It can scan details finer than can be seen by the naked eye up to the size of a lounge. It can even capture colour and map it onto your model. The included software is powerful, simple to use and has an intuitive workflow. There is a lot of smart technology working in the background of the David Lasserscanner Software. Complex algorithms work in background that analyse the captured information to reduce noise and eliminate erroneous data. Once sufficient views of an object have been captured, the software aligns each of the individual views by finding common features between them. It can even use captured colour information to assist in this automated alignment process. The Fusion command does a very neat job of stitching the model together into a complete watertight mesh ready for 3d printing, reverse engineering, analysis or exporting into other downstream applications.
I have been working with 3D scanned data and professional 3D Laser and Structured Light Scanners for over ten years. I was skeptical that results of this quality could be achieved with any 3D scanner under $30K. My first foray using this David SLS-1 left me speechless. This is a complete package with powerful software put together with intelligent German ingenuity and attention to detail.
The David SLS-1 Kit is a game changer. This is a great package for professionals, designers, engineers, schools and enthusiasts. Thanks to David Vision Systems, high resolution structure light 3D scanning is now available to everyone.
written by: Mark Pestkowski - Industrial Designer, specialising in complex freeform design, reverse engineering and 3d scanning.